Science
Frogs and Toads Together: Why do Amphibians Group Up?April 11, 2025

An elementary teacher science blog
Affiliate disclosure: As an Amazon Associate, I may earn commissions from qualifying purchases from Amazon.com. This is at no extra cost to you. If you’d like to learn more, check out my disclaimers page.
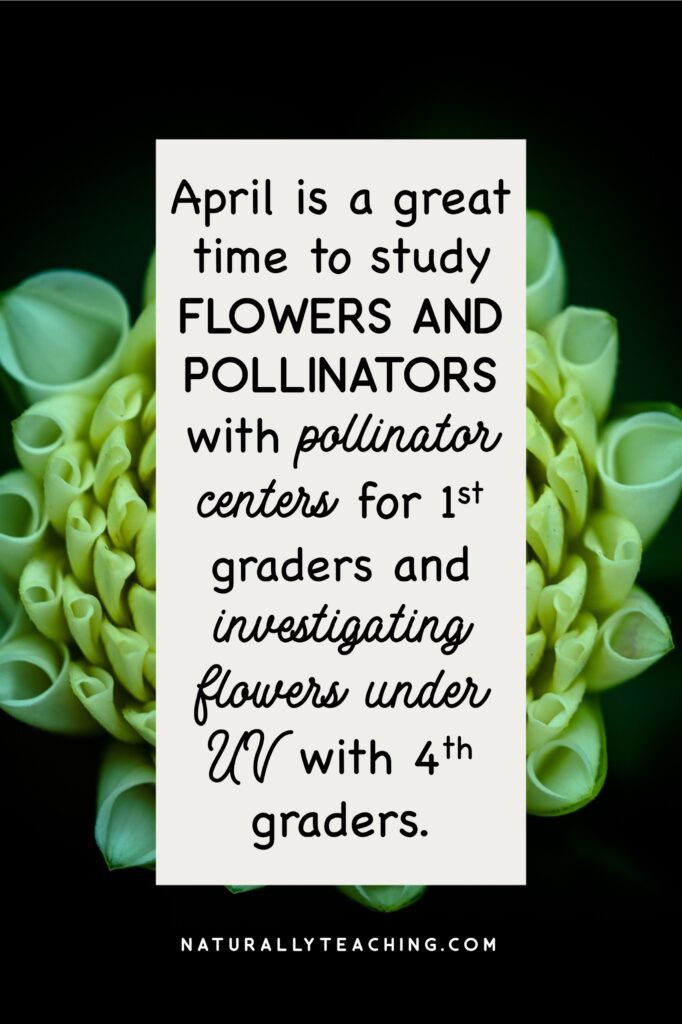
Teaching children about how flowers attract pollinators can feel kind of dull. However, investigating how flowers and pollinators work together can make this topic come to life! Thankfully, April is a time when the flowers are just starting to bloom and the pollinators are waking from their winter sleep, making it a magical time to start diving into pollinator partnerships.
In this episode, we’ll talk about activities to investigate how flowers attract pollinators that are paired with Next Generation Science Standards for grades 1st and 4th. I’ll share the standard that inspired the activity, how the activity relates to how flowers attract pollinators, and descriptions of how to use the activity with your learners.
The following standards are paired with activities to learn about how flowers attract pollinators:
Affiliate Disclosure
I only endorse things that I’ve personally used, come highly recommended by trusted peers, or I’ve done extensive research on. As an Amazon Associate, I may earn commissions from qualifying purchases from Amazon.com. This is at no extra cost to you, the commission is covered by the company.
I am recommending products that I think will be genuinely helpful and useful, and not because of the small commissions that I receive. Please only purchase items if you believe that they will help you achieve your educational goals. If you’d like to learn more, check out my disclaimers page.
[0:00]
Teaching elementary-aged children is a rewarding experience, but as educators and parents, finding the time and resources to create engaging lessons can be a challenge. That's where this podcast comes in. Welcome to Naturally Teaching Elementary.
I'm Victoria Zablocki, a certified elementary teacher turned outdoor educator. With over a decade of experience coaching teachers on effective teaching methods, I'm passionate about teaching the whole child with authentic and place-based experiences in school and home settings. Join me as we explore strategies for teaching with practical teaching tips, insightful interviews, picture book reviews, and more.
So let's grow together. All right. Welcome back to the Naturally Teaching Elementary podcast. My name is Victoria Zablocki and I'm your host.
So if you listened to last week's episode, episode 65: Flowers and Pollinators: Kindergarten and 3rd Grade Next Generation Science Standard Activities, you heard a couple of ideas for taking kindergartners and third graders outside to investigate flowers and pollinators. You also heard me remind you that April is a great month to investigate flowers and pollinators as both of them are waking from their winter sleep.
So to continue taking advantage of the springing of flowers and pollinators, this week we'll focus on how flowers attract pollinators in connection to first and fourth grade Next Generation Science Standards. First and fourth grade standards have animal and plant heredity in common, and pollinator partnerships can help us investigate that concept. So, in this episode, I'm going to describe activities to investigate how flowers attract pollinators for grades first and fourth.
For each activity, I'll share the Next Generation Science Standard that inspired that activity as well as the scientific phenomenon that activity helps explain. Make sure that you listen through to the end of the episode because even though I paired these activities to particular standards, you may find yourself inspired to use a similar concept for your curriculum or even use the same activity for a different grade. Also, if you're new to taking your students outside for learning, check out Episode 6: 5 Outdoor Education Safety Tips for Teaching Outside for suggestions to make teaching outside easier. Now let's get into these activities to explore how flowers attract pollinators.
[2:08]
For first grade, the Next Generation Science Standard that I pulled was 1-LS3-1: Make observations to construct an evidence-based account that young plants and animals are like, but not exactly like, their parents.
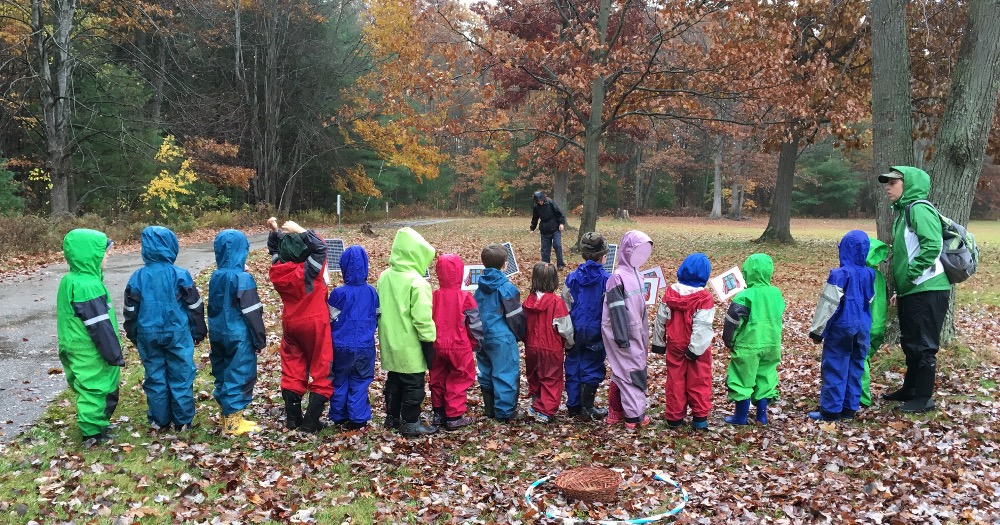
So for first grade, I would suggest creating centers that give your learners the opportunity to match pollinators with flowers that have evolved with them over time. This activity is inspired by an activity called Fill the Bill that is copyrighted by the National Wildlife Federation. To give you a quick summary of their activity, they put together centers for different kinds of beak shapes and what those beaks are adapted to eat.
At each center, there's something that represents the kind of food a bird may eat, like worms, seeds, nectar, and different tools for children to try to “eat” the food with. To learn more about that particular activity, I have a link in the show notes and you can check it out there. My vision, however, for this pollinator and flower activity would be to set up five different centers that represent five different pollinators.
Each center would have a tool that represents the mouth part of each pollinator, a flower that meets the pollinator needs, and two or more flowers that don't fit the pollinator's needs. Once set up, your learners will visit each center trying the mouth part with the different flowers at the center, attempting to determine what flower fits each pollinator best. To help inspire you, I'm going to share descriptions for five different centers and you can decide what would work best for you and your learners.
I'm also going to share some of the things that each pollinator looks for in a flower, and it may help your learners if you put together a small sign for each pollinator at each station. Your sign could include a picture of the animal, plus some of the characteristics they're looking for in flowers. With that in mind, this activity will provide an opportunity for your learners to pair pollinators with the flowers that work best with them.
This activity relates back to that Next Generation Science Standard because both plants and animals inherit similar characteristics from their parents so that they're successful in life, and in this case, specifically pollination.
One center will be focused on hummingbirds as the pollinator. You'll want to find either a faux flower that has long tubular flowers or short tubular flowers. Provide your learners a pipette, dropper, or other skinny collection tool to represent the beak of the hummingbird. Then put two other flowers that do not have tubular flowers at the center so that they can use the pipette to determine which flower would work best for the hummingbird's long beak.
Hummingbirds are looking for brightly colored flowers, especially bright red, orange, and hot pink. They visit flowers with a tube shape or a trumpet shape that hang instead of sitting erectly. This decreases the competition from other animal pollinators.
Another center can focus on bats. For this activity, you can provide your learners with a large bowl shaped flower that's white and open, and then also two flowers that are colored and closed that look almost like buds. You can also spray that white flower with a fragrance so that it smells fruity. Nectar-eating bats visit flowers at night, so they don't need to be able to see color, but instead follow the scent and reflection off of lightly colored flowers.
Many flowers close at night while others are open at night, and bats visit those flowers that are open at night. You'll also want to provide them a fuzzy stick, formerly known as a pipe cleaner, to use as the bat's sticky fork-shaped tongue.
Nectar-eating bats can be found in the southwestern United States, down into South America, so you'll have to decide if you'd like to add them to the experience or not. Do you want this more place-based, something that you could find in your area, or do you want to have a wide range of different types of pollinators? That's up to you and your discretion. These bats are seeking fragrant flowers that smell fermented or like fruit. They're shaped like an open bowl. They bloom at night and are light colors such as white, pale colors, or green.
Another center can focus on bees. For this center, you can provide your learners with a blue, yellow, or purple flower that has lines on the petals leading the bee to the nectar in the middle of the flower. You could also spray this flower with a floral scent to attract the pollinator. The other flowers can be other colors including red, yellow, orange, pink, or white without lines on the petals.
For the feeding tool for your learners, you could provide a straw to represent the proboscis of the bee, reminding your learners not to put it in their mouths. More than one of them will come through the station, and if they put their mouth on it or somebody put their mouth on it before them, they could get sick. It'll be tricky, but you can make it happen.
Bees are looking for flowers that are brightly colored, especially blue, yellow, or purple, have patterns that guide them to the nectar, also called nectar guides, and are very fragrant.
Another center can focus on butterflies. For this center, you can provide your learners with a flat, topped, or clustered set of flowers that are brightly colored. Butterflies are particularly attracted to flowers that are red, yellow, orange, purple, and pink. They also like the flat, topped, or clustered flowers because they work like landing pads and make finding a spot to rest while eating much easier.
You can provide your learners a party blower to represent the proboscis at this center, again reminding your learners not to put their mouth on this tool either. Another thing you could do is put masking tape on the ends of the straw and the party blower as a way to remind them that this isn't actually something to put your mouth on. For the additional flowers at the station for the butterflies, you could put flowers that are not tubular or flat topped and are blue, yellow, green, or white.
The last center can focus on moths. Moths like flowers that are a combination of bats and butterflies. Because many moths are out at night, they're attracted to light colored flowers that are white, pale, or silver that reflect the light of the moon, similar to bats. They also like the strong floral smells that help them find the flower in the dark.
And like butterflies, they like flat-topped or clustered flowers that they can more easily land on. So for this center, you'll want to find white, pale, or silver flower that is flat-topped or clustered, and you'll want to provide a party blower for this center as well. Again, reminding them not to put it in their mouth and also consider putting that masking tape on there.
Moths have a proboscis that's very similar to butterflies, and it's worth repeating the same tool for the same mouth part. You can also spray this flower with a strong floral scent similar to the bee's center, and for the additional flowers, you can provide another set of colored flowers that are closed because again, moths visit flowers that are open at night, and the rest of the flowers that we typically see during the day would be closed.
So I try to steer clear of activities that require you to have to purchase materials because let's face it, teachers don't have much of a budget to buy things for their classroom. However, if you could hit the Dollar Tree or somewhere cheap to get faux flowers and these handful of tools, this could be a really valuable, interactive, and intriguing set of centers that you can use year after year. And I really think it would benefit your learners.
[9:07]
For 4th grade, the Next Generation Science Standard that I pulled was 4-LS1-2: Use a model to describe that animals receive different types of information through their senses, process the information in their brain, and respond to the information in different ways. So for 4th grade, I would suggest taking a look at flowers captured under ultraviolet light. Flowers have different colors in the visible light spectrum and the ultraviolet light spectrum.
We see flowers in the visible light spectrum, but insects see in the ultraviolet light spectrum, and the flowers have diverse ways of “talking” to insects. So if you'd like to introduce the concept of flowers talking to insects before looking at these pictures, you could read either Flower Talk by Sara Levine, illustrated by Masha D'yans, or Flowers Are Calling by Rita Gray, illustrated by Kenard Pak. These two picture books provide some context for your learners about ways that flowers attract pollinators including color, pattern, smell, and shape.
Once your learners have a bit more background, you can pull up the website by Bjorn Rorslett, which I'll have a link for in the show notes for you. There are lots of different references out there, but Bjorn's site has so many different flowers, and they've really taken the time to catalog a variety of colorations and patterns. Bjorn also shares some background on how they're able to capture the ultraviolet light pictures, which could be helpful as you're trying to explain it to your learners.
They make sure to mention that the patterns are what are important in these images. When capturing ultraviolet light pictures, the colors can be manipulated, but the patterns are natural, so focus on dark and light, lines, and full color. Not necessarily the color presented in the image.
With that being said, it's really interesting to take a look at the different ways that flowers present themselves. The first picture on each page is of the flower in the visible light spectrum, aka what we see. When you go to Bjorn's website, don't get overwhelmed. You might see a lot of scientific names because they've labeled all of the specimen that they've captured by the scientific name. But what you can do is you can select a link, scroll down under the second picture, and many times the common name is right there of each of the flowers. Also, if you're not finding it within the actual web page from Bjorn, then you can copy and paste that scientific name and put it into Google asking for the common name and you'll get it popped up.
Then you'll know which species are near you and which ones are not as well. I went through and cataloged just some things that I would pick from Bjorn's website based on my location. So in Michigan, I have a list that I would use because it includes a daffodil, orange hawkweed, oxide daisy…but you wouldn't know that unless you go through and you pull all the scientific names.
So make sure you go to my website, check out the show notes, and you can pull some of the same flowers that I pulled. Save you some time. After looking at the pictures on the website, however, I would suggest taking your learners outside and giving them a chance to find a flower in your green space.
Draw it in the visible light spectrum, and then also imagine what it could look like in the ultraviolet light spectrum. This is both an exercise in knowledge application as well as creativity. There's no right or wrong answer here, but it's an opportunity for your learners to show what they've learned.
Do they want to direct the insects to the pollen using guidelines, or do they want to give it a bullseye? Do they want the coloration to be solid and use smell instead of any sort of guides? Or, would they rather this flower be pollinated by the wind and not have any flashy colors in the visible light spectrum or the UV spectrum?
This decision is up to them. Going back to the standard, taking a look at flowers under ultraviolet light helps your learners understand that animals see and interpret things differently than we do thanks to their unique senses. By designing their own interpretation of how the flower would attract an animal, they're taking that concept and applying it in a real-world context.
And as a side note, Bjorn explicitly states that all images on their website are subject to copyright and cannot be used for any reason without explicit written permission. Although there is the Fair Use Doctrine, you want to be incredibly careful about not putting these images out to the public or using the images for anything other than educating your students. If you choose to make a PowerPoint presentation or handouts, make sure they remain in your classroom for you and your learners' eyes in education only.
[13:36]
So, in a nutshell, today we talked about activities for 1st and 4th grade about how flowers attract pollinators. For 1st grade, we talked about creating pollinator partner centers, where your learners match the pollinator mouth part to a flower that meets their needs. And for 4th grade, we talked about looking at flowers captured under UV light and then taking a flower from your green space and designing what it looks like in the UV spectrum.
So thanks for taking time to listen today. I know you're busy and I truly appreciate the time you take to tune in. If you have any questions, wonderings, or activities to investigate how flowers attract pollinators that you use, get a hold of me on Instagram at naturally.teaching, or you can email me at victoria@naturallyteaching.com.
And don't forget to check out the show notes for this episode at naturallyteaching.com/episode66 for all the links that I mentioned. So thanks again for joining me today, and until next time, keep exploring, keep learning, and keep naturally teaching. Thank you so much for tuning in to today's episode of the Naturally Teaching Elementary Podcast.
I hope you found it informative, inspiring, and full of actionable insights to enhance your teaching journey. Connect with me on social media for more updates, science tidbits, and additional resources. You can find me on Instagram and Facebook at naturally.teaching.
Let's continue the conversation and share our passion for teaching elementary age children together. Don't forget to visit my website at naturallyteaching.com for all the show notes from today's episode. If you enjoyed today's episode, please consider leaving a review on your favorite podcast platform.
Your feedback helps me improve and reach more educators like you. Thank you again for listening, and until next time, keep exploring, keep learning, and keep naturally teaching.
0